May 2020, Vol. 247, No. 5
Features
Tips for Safe, Successful Horizontal Directional Drilling
By Joel D. Moore, Engineer (PE), JHA Companies
Over the last 25 years, I have been involved with designing and inspecting horizontal directional drills (HDD) for pipeline construction, attending numerous seminars, purchasing many texts and reading countless white papers related to the subject. Of much more educational value (and fun) is the many hours spent on drilling sites, asking questions and listening intently to the folks running the drill.
Listening to all of the “hands” on the site that know a lot more than “those engineers” has taught me several rules of thumb for HDD design. So now that I am starting to turn a bit gray, I think it’s time to share my 10 Rules of Thumb. If you are looking for a technical dissertation, there are plenty of papers and books on the subject with much more engineering and experience behind them than what you will find here, and while I am interested in the subject, this is just my totally biased opinion.
- Drill More Core Drills – You paid a lot to have your geotech crews mobilized. Make it worth your while by drilling multiple holes on each side of the feature you are looking to cross – two as close as possible to the feature you are crossing and two about 20 to 25 feet (6.1 to 7.6 m) to the right and left of your designed bore path. (That’s four holes right next to the stream, road or other feature).
Be smart and have the holes grouted in when they are done. Drill deeper than you think the bore path will be. Drill another set of core drills near the entry and exit points. Again, drill to each side and offset from your designed path. For a long drill, and in areas where the near surface geology changes a lot, drill even more sets.
If you have good reason to believe that the subsurface is consistent, then you can back off the number of core drills. If it is not, then the money spent on geotech information will save many times that amount in the HDD driller’s bid price, and if they know where the cobbles and solid rock are, for instance, you will save even more and have a better chance at success. Don’t forget to share the information with the bidders.
- Design for a Larger Radius – The conventional wisdom is (or was) a 100-foot (30.5-m) radius per 1 inch (25.4 mm) of pipe. However, what really happens is that the pilot drill hole drill path is rarely an actual nice, smooth radius. It is usually more of a series of short straight drills, curves of various radii and lots of “corrections.” The driller will set the “bent sub” to a specific angle and can rock the drill string back and forth to create a desired radius, but my experience is it may not be a very smooth curve. Lots of drillers today will prefer a design with a 120-foot (36.6-m), 1-inch pipe; I believe this is a minimum.
As we use higher and higher yield strength and heavier wall pipe, the drill string becomes pretty stiff on pull back, and without a smooth hole, it takes a lot of force to pull it into the hole. Yes, the driller can ream out the high spots or ream a size larger than what would have otherwise been necessary, but a larger radius by design, and a driller with some patience during the pilot drill, will pay off.
If you find that the pullback force is really high even though you are in nice rock, then you might be damaging the pipe coating on the spots that are causing interference. You will not necessarily see that on the first half of joint of pipe either.
- Use Heavier Wall Pipe – The diameter-to-wall thickness (D/T) ratio needs to be less than 50. First, it will give you a better chance of not having the pipe collapse during pullback, and second, it will give you more wall thickness to compensate for gouges. I have witnessed a collapse first-hand with a now abandoned 10-inch (254-mm) pipe under the Allegany River near Olean, N.Y., “installed” in the late 1990s that was too thin given the diameter.
- PowerCrete, not ARO Coating – Specify PowerCrete rather than abrasion-resistant overlay (ARO) for your pipe coating, if you really care about protecting the fusion-bonded epoxy (FBE) coating and your steel from corrosion. A good spec is 40-mils (1.016-mm) PowerCrete R-95 over 14 to 16 mils (0.356 to 0.406 mm) FBE.
ARO is good for installing pipe in road/stream crossings or in places where it is difficult to pad the pipe or install rock shield. The PowerCrete product will have greater abrasion resistance, a lower coefficient of friction, and it looks nicer. Don’t forget to hire a NACE inspector to inspect the coating on the welds.
- Don’t Drill around a Corner – Drilling around a corner is fine for plastic pipe and maybe small-diameter steel, but it is torture on the drill pipe and difficult to get a nice smooth hole.
There is a way to design it so that the pipe passes through just one plane, but it takes a lot of geometry (3-D computer-aided design [CAD] works well to design those drills). Extra bends/curves add to the possibility of increased downhole mud pressures and the potential for an inadvertent return. It is best to figure out another way to get from Point A to Point B, if possible.
- Specify that the Contractor must use a Tru-Tracker or Equivalent – The direct current (DC) tracking system used for many years to steer the pilot bore is a must for any serious HDD crossing. Be smart and don’t let the contractor shoot in the dark. If he is willing to do that, find another driller.
- Share the Risk with the Driller through a Fair Contract – Be very careful here and do your research for proper contract language. At one extreme, you will pay too much, and at the other extreme, you will inadvertently encourage the contractor to cut corners to keep from losing business. You do not want the driller to “just pull the pipe in.”
- Prepare for Inadvertent Returns – Be ready for inadvertent returns (IR). Directional drills have the potential to release drilling fluids (primarily a bentonite clay-water mixture) to the surface through IR (commonly referred to as “frack-outs”). Prepare a contingency plan that addresses personnel responsibilities, response procedures, containment materials, appropriate cleanup procedures and proper documentation.
The purpose of the contingency plan is to minimize the potential for an IR, provide for timely detection, ensure proper notifications are made, protect areas that could be considered environmentally sensitive and ensure an organized and timely response in the event of a frack-out. Lastly, tell the permitting agency that you are doing everything possible to prevent an IR, but just in case, present the contingency plan.
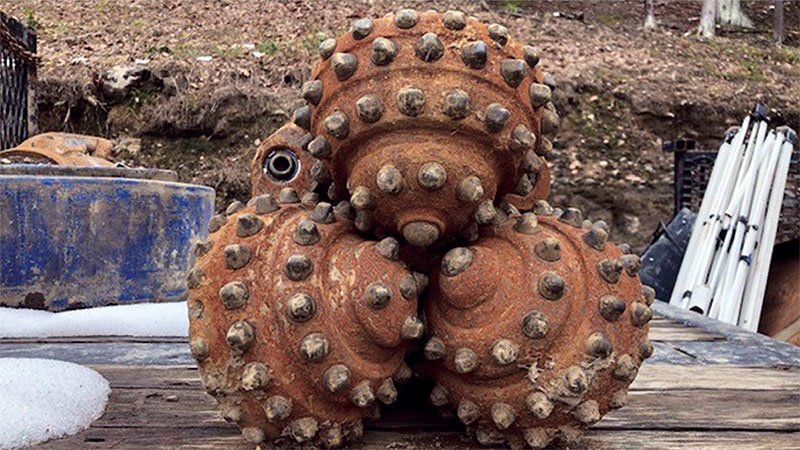
- Do not Push the Reamer – While this has nothing to do with the design phase of an HDD project other than perhaps giving yourself additional space on the exit side to put the drill rig, it seems that every time I have witnessed a broken drill string, it occurred while a reamer was being pushed.
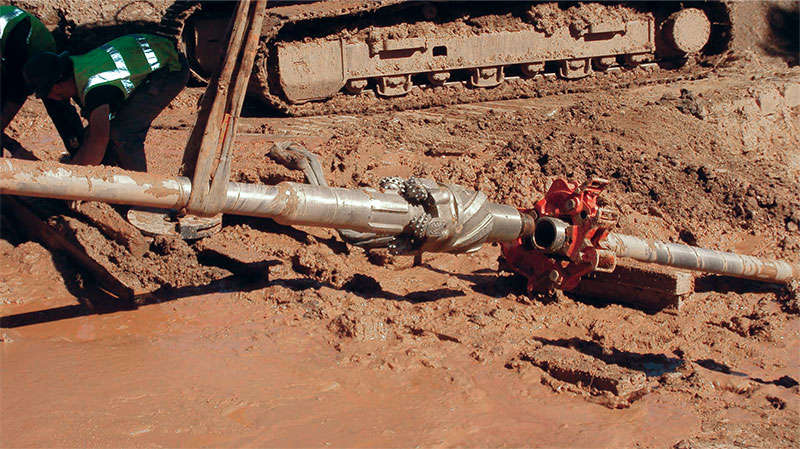
Just imagine a 6-inch (152-mm) steel rod extended 2,000 feet (609.6-m) into a 30-inch (762-mm) hole and pushed hard enough to begin to snake back and forth. Now imagine rotating the whole thing fast when the reamer is likely taking a lot of torque to turn it, or the drill rod is making three or four revolutions at the HDD rig. The rod is getting all wound up before the reamer breaks loose.
Imagine the fatigue the drill rod has experienced. What do you do when the driller says, “We have to do it that way”? If you are feeling generous or really need to get it done, see if there is not an opportunity to get another rig in there on the exit side and maybe salvage what you have before you twist off.
- 1 Hire a Competent HDD Contractor – This is the final and most important tip The key word here is “competent.” If the contractor is the low bid, then you probably do not want them. If you don’t have a history with them, then ask for the names and contact information for the last 10 drills they did of similar size and length.
Ask if they have drilled in the local area and their history in the type of soils they are going to encounter. Most importantly, ask who will be the actual “driller” or “drillers” controlling the drill bit, and what level of experience they have.
If your driller pushes hard and drills a winding pilot hole with lots of corrections, then you are in trouble from the get-go. Is he being slow and steady, focused, intelligent, knowledgeable, and has he been successful at “fishing” a broken drill stem (that they broke while pushing the reamer)? If not, then ask them if they know any good drillers.
The bottom line is this: Anyone with rudimentary CAD skills can design an HDD. Anyone with some money can buy a used HDD rig and go into the drilling business. Anyone with some luck can drill down into the ground and come up somewhere on the other side of the road or river. But if you need to the pipe round and able to hold pressure at the end of the day, then plan accordingly, follow the rules and hire the best driller you can find.
Author: Joel Moore is a licensed professional engineer who has worked in the transmission and distribution gas industry for more than 30 years and who has more than 20 years of experience with HDD. In 2018, he sold his company, Integrity Engineering PLLC, to Montrose, PA-based JHA Companies, where he continues to perform HDD design and consult on troubled bores.

Comments